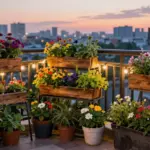
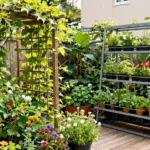
If you’ve ever found yourself staring at a pile of broken tiles, wondering what to do with them, you’re not alone. The beauty of the gardening season often inspires a desire to create, and this year, many of us are looking for ways to infuse creativity into our outdoor spaces. That’s where mosaic flower pots come into play. They not only give a second life to your broken tiles but also add a splash of personality and color to your garden.
If you’re a gardening enthusiast who loves crafting or simply someone who enjoys DIY projects, this post is tailored for you. You’ll discover how to transform those seemingly useless pieces of ceramic into stunning, eye-catching flower pots. Whether you want to create fun geometric patterns or a vintage floral design, you’ll find ideas that suit your style and skill level.
Get ready to dive into 14 exciting mosaic flower pot ideas that combine art with gardening. This guide offers you practical steps, creative inspiration, and a chance to express your artistic flair in a way that’s eco-friendly and budget-friendly. By the end, you’ll have the tools, techniques, and ideas you need to craft unique upcycled flower pots that are sure to impress friends, family, and your plants!
Key Takeaways
– Discover 14 unique mosaic flower pot ideas that will help you revamp your garden decor using broken tiles.
– Learn about different styles, like colorful geometric patterns and rustic earthy tones, to find the look that best fits your personality.
– Get insights into techniques for using broken tiles effectively, ensuring your projects are both fun and functional.
– Explore the benefits of upcycling materials, promoting sustainability while creating beautiful art for your home.
– Find tips for personalizing your pots with initials or quotes, making your garden decor truly one-of-a-kind.
1. Colorful Geometric Patterns

Elevate your flower pot game with vibrant geometric patterns that invite creativity. By using broken tiles in bold hues of blue, yellow, and red, you can craft a design that captivates and inspires. Sketch your geometric shapes on the pot, then glue the tiles in place for a stunning visual effect.
To bring your vision to life, gather tiles of varying sizes for added dimension. Pre-arranging tiles can help you finalize your design before committing with adhesive. Don’t forget to seal your masterpiece with a waterproof finish for durability.
Consider these steps to enhance your geometric design:
– Pair contrasting tile colors for striking patterns.
– Install a variety of tile shapes for added interest.
– Use a glossy sealant to make colors pop.
This approach not only brightens your gardening space but also encourages creativity in the whole family, making it a perfect project for kids.
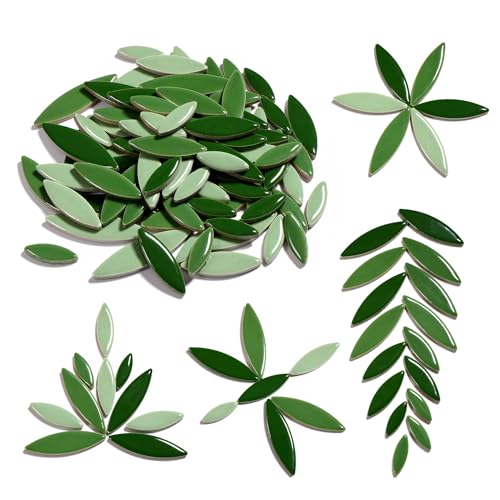
Feature: Ceramic mosaics , the surface is smooth, won't hurt your hands, uniform thickness, more brightly and beautiful in a closer distance; The color of these mosaics will never lose

Feature: Ceramic mosaics , the surface is smooth, won't hurt your hands, uniform thickness, more brightly and beautiful in a closer distance; The color of these mosaics will never lose

Premium Material: Made of glass; mosaic glass pieces suitable for mosaic art and crafts works
2. Whimsical Animal Shapes

Bring a playful spirit to your garden by designing flower pots that mimic your favorite animals. With broken tiles, you can create charming figures like frogs or turtles peeking from behind your plants. Start with a round pot and outline your chosen animal shape for an adorable touch.
For a frog, use green tiles and textured pieces for a lifelike appearance. For a turtle, assemble brown tiles to form a shell and add a friendly face. Brightly paint the pot to amplify its whimsical charm.
Here are ideas to spark your creativity:
– Use vibrant tiles to create lively animal features.
– Incorporate natural elements like leaves or flowers.
– Paint cheerful patterns around the animal for extra flair.
These imaginative designs not only brighten your garden but also spark joy and conversation among visitors.

Authentic Briarwood Lane Craftsmanship

Artistic Decorative Flower Pot with Colorful Mosaic: Featuring a colorful floral mosaic pattern, this decorative flower pot adds artistic character to indoor and outdoor spaces
How To Choose The Right Materials for Mosaic Flower Pots
Choosing the right materials for your mosaic flower pots is key to creating a beautiful and durable piece of garden decor. Here are some important factors to consider when selecting materials for your project:
1. Tile Type
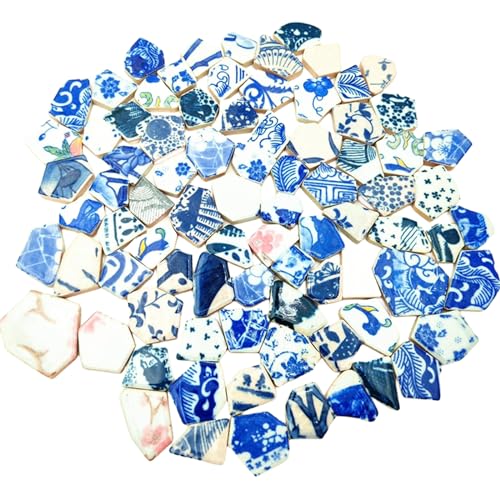
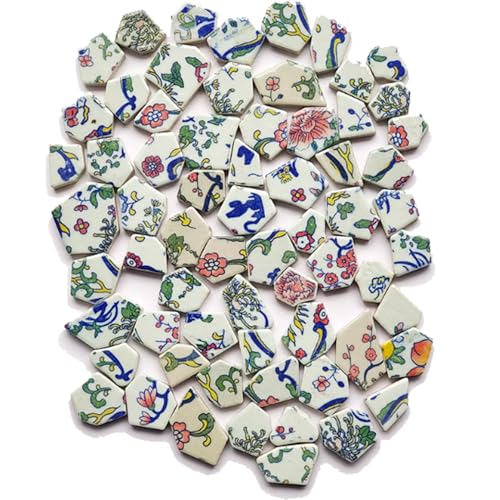
Decide on the type of tiles you want to use. Ceramic tiles are popular for their variety of colors and patterns. Glass tiles add shine and depth, while natural stone tiles bring a rustic charm. Choose tiles that match your garden style and will hold up to the elements.
2. Size of Pieces
Consider the size of the tile pieces. Smaller tiles can create intricate designs, while larger pieces can make bold statements. For beginners, starting with medium-sized tiles can help you get the hang of laying them down without feeling overwhelmed.
3. Adhesive Choices
Selecting the right adhesive is crucial for your mosaic flower pot’s longevity. Use waterproof adhesive for outdoor pots to ensure they withstand moisture and temperature changes. A thinset mortar is often a good choice for heavier tiles, while a mosaic glue works well for lighter materials.
4. Grout Selection
Grout is not only functional but can also enhance your design. Choose a grout color that complements your tile colors. Dark grout can make bright tiles pop, while light grout can create a softer look. Make sure your grout is also waterproof to resist mold and weather damage.
5. Personal Touch
Think about adding personal touches to your flower pots, like initial letters or quotes. You could use different materials like buttons, shells, or beads to create a unique design. This customization makes your pots stand out and reflect your personality.
Pro Tip: Before starting your mosaic project, lay out your design on a flat surface without adhesive. This way, you can see how the pieces fit together and make adjustments before committing to the final look.
With these tips, you’ll be well on your way to creating stunning mosaic flower pots that enhance your garden space beautifully. Engaging with broken tiles is not only a fantastic way to recycle but also a chance to express your creativity!

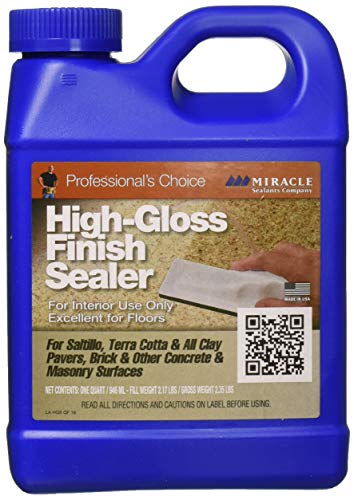
For use inside or out on a variety of surfaces including sanded grout, ceramic tile, porcelain tile, glazed tile, stucco, travertine, marble, slate, granite, terrazzo and more to protect against water, stains and slippage

Perfect for all your mosaic creation needs, Mosaic Glue takes your indoor and outdoor projects to the next level. Its no-string, non runny formula is designed to bond all types of mosaic tiles: ceramic, glass, plastic, wood, to various surfaces including glass, wood and more.

This sealer ensures that crafts, artwork and home décor remain just as beautiful as the day you lay the tile.
3. Rustic Charm with Earthy Tones

Create a warm and inviting atmosphere with mosaic flower pots featuring earthy tones like terracotta, olive green, and soft browns. These natural colors harmonize beautifully with the surrounding flora, enhancing your garden’s rustic appeal. Break tiles into smaller pieces and arrange them randomly over the pot for an organic look.
Mix smooth and textured tiles to create visual interest. A matte sealant can preserve the rustic feel while protecting your design. Pair these pots with succulents or herbs for a delightful, cohesive vibe.
Implement these tips for a stunning rustic effect:
– Incorporate natural materials like pebbles for added texture.
– Use varying tile sizes to enhance depth.
– Opt for a rustic finish to complement the earthy tones.
This design approach beautifully complements gardens that celebrate nature, appealing to those who appreciate simple elegance.

All-Inclusive Adult DIY Mosaic Flower Pot Kit – This complete DIY mosaic kit for adults includes a high-quality ceramic flower pot, premium glass mosaic tiles in three curated color palettes, adhesive, grout, and a detailed step-by-step instruction guide. Designed for adult home décor projects—no additional tools required.

【Complete DIY Mosaic Planter Kit】This all-in-one mosaic art set includes a variety of irregular ceramic tiles, a quality flower pot with drainage hole, matching saucer, sealant, sponge, mixing bowl, and a step-by-step instruction guide — everything you need to create your own tile craft masterpiece at home.

Versatile Plant Hosting: Measures 5 ¾ and 4 ¾ inch in Dia. Suitable for a variety of houseplants, these pretty plant pots embrace everything from orchids and succulents to peppermint, making them adaptable for both small garden plants and indoor foliage; let your gardening creativity flourish with the flexibility to mix and match your favorite flora in one cohesive set, ensuring your green oasis reflects your personal style and botanical diversity.
4. Sparkling Mosaic with Glass Tiles

Infuse your garden with glamour by incorporating glass tiles into your flower pots! The reflective quality of glass elevates a simple pot into a dazzling work of art. Choose colorful glass tiles in various shapes and sizes to create a mosaic that sparkles in the sunlight.
Handle glass tiles with care, and opt for clear adhesive to highlight their beauty. Sealing the pot after completion will protect the glass and enhance its shine.
Follow these expert tips to maximize your glass tile design:
– Arrange tiles to create captivating patterns.
– Use contrasting colors for a vibrant effect.
– Experiment with tile shapes for a unique look.
These stunning pots will not only catch the eye but also reflect light beautifully, adding a touch of magic to your outdoor space.

5-inch 3D Puzzle Planter: Unlike most pots on the market, ours feature a 5-inch diameter, making them a practical size for most small indoor plants.

QUALITY: These ceramic mosaics have a smooth surface and uniform thickness for a beautiful appearance and long-lasting color.
Complete DIY Mosaic Kit:This set includes 1 pound of authentic blue and white porcelain tile pieces, perfectly curated as mosaic tiles for crafts to fuel your creative DIY projects.
5. Patterned Patchwork

Embrace your creativity with a delightful patchwork effect using leftover tiles in various patterns and colors. This eclectic style allows for personal expression and a charming visual narrative. Randomly select your tiles and glue them onto the pot, ensuring that each section tells its own story.
Balance bold colors with neutral tiles to create visual harmony. Mixing tiles with different textures can enhance the patchwork effect, while a patterned rim ties the whole design together.
Consider these points for a standout patchwork design:
– Arrange tiles in a way that flows visually.
– Use contrasting textures for depth.
– Create a cohesive border to frame the pot.
This creative style not only grabs attention but also reflects your unique journey, making every pot a personal masterpiece.

Friendly reminder: We only provide mosaic materials for floral designs, Glue and base are not included.

Premium Material: Made of glass; mosaic glass pieces suitable for mosaic art and crafts works

3D FLORAL EMBELLISHMENTS– Raised ceramic flowers with layered petals create a lifelike dimensional look that makes your mosaic projects stand out
6. Elegant Ombre Effect

Achieve sophistication with the ombre technique using your broken tiles. Select a gradient of colors that transition smoothly from light to dark, creating a stunning visual effect around your pot. Start with the darkest shade at the bottom and gradually lighten as you move toward the top.
Using tiles in similar hues will create a seamless blend. Cutting tiles into smaller pieces can help achieve a smoother transition, while a glossy finish adds an elegant shine.
Apply these techniques for a flawless ombre design:
– Select a harmonious color palette.
– Ensure even spacing for a uniform look.
– Seal the pot for protection and shine.
This elegant approach will elevate your garden decor, making it perfect for formal settings or as a stylish indoor accent.
7. Vintage Floral Patterns

Capture the essence of vintage charm with floral-themed mosaic pots. Use tiles that display floral designs or create your own by painting plain tiles with lovely motifs. This style adds a romantic touch to your garden, inviting tranquility and beauty.
Combining pastel shades can evoke a soft, vintage feel. Adding intricate details and elegant borders enhances the overall design, while choosing classic-shaped pots amplifies the vintage allure.
Consider these suggestions for your floral designs:
– Use soft colors to evoke a timeless quality.
– Incorporate detailed patterns for added elegance.
– Opt for traditional shapes to enhance the vintage look.
These charming pots are perfect for flower arrangements and can beautifully complement a cottage-style garden or tea setting.
Did you know 72% of garden lovers say mosaic flower pots with pastel floral designs invite more compliments? Lean into vintage charm by painting tiles with motifs and adding delicate borders for a romantic, garden-ready look.

EFFECTIVE WATERPROOFING FOR SMALL REPAIRS - YKF transparent waterproof sealant 12 oz is a water-based clear coating that cures into a dense protective membrane to help block water, air and moisture. Ideal for small leak repair, surface sealing and waterproof protection around roofs, walls, bathrooms, kitchens, sheds and outdoor areas.

Convenient applicator bottle included; applicator tip
8. Statement Piece with Bold Colors

Create a stunning focal point with flower pots that feature bold, vibrant colors. Opt for tiles in eye-catching reds, yellows, and blues, and craft an abstract design that draws attention. Start with a dominant color and build your artistic vision around it.
Using contrasting colors will make your design pop even more. Don’t shy away from adventurous shapes; think stars, hearts, or other playful forms! Strategically place these pots to maximize their impact in your space.
Here are some tips for creating a powerful statement:
– Layer colors to create depth and dimension.
– Experiment with shapes for uniqueness.
– Position in high-visibility areas for maximum effect.
This design is ideal for modern gardens, adding a lively and energetic atmosphere to your outdoor space.
Bold colors make mosaic flower pots pop—start with a dominant hue and build your design around it. Use contrasting reds, yellows, and blues for drama, and try playful shapes like stars or hearts. Place these statement pieces where they’ll catch every eye.

Irregular Mosaic Tiles: 1.1lb/500g Irregular dazzling glass mosaic tiles in various shapes colors, enough for multiple stained glass mosaic projects. Having all these precut beautiful Irregular shapes, but will inspire you when trying to create designs

【Exquisite Handmade Mosaic Art Design】 The appearance of each flower pot showcases unique floral mosaic patterns with vibrant blue and white glass mosaic tile, meticulously handmade inlay by skilled artisans. Which are wear-resistant and fade-resistant, perfect for indoor or outdoor use
Material: Our petal ceramic mosaic tiles are made of premium-quality clay with smooth surface and edges and uniform thickness
9. Minimalist Style

Embrace the beauty of simplicity with minimalist mosaic flower pots that focus on clean lines and a limited color palette. Using tiles in shades of white and gray, arrange them in an organized pattern for a sleek, modern look. This style is perfect for contemporary garden settings.
Keep your design straightforward; remember that less is more. Opt for larger tiles to reduce the number of pieces, and ensure even spacing for a uniform appearance.
Utilize these strategies to achieve minimalist elegance:
– Stick to a monochromatic color scheme.
– Use geometric shapes for added interest.
– Maintain a neat finish for a polished look.
These pots blend seamlessly with modern architecture, creating a serene and zen-like atmosphere in your garden.

CREATE YOUR OWN STARRY NIGHT MASTERPIECE Inspired by iconic The Starry Night, this kit lets you recreate your own masterpiece with vibrant mosaic tiles. Perfect for art lovers, it’s a unique way to bring artistic elegance to your home.

Charming Design: These glass cabochons feature intricate blue and white patterns, reminiscent of classic tile art. Each piece features beautiful novel flowers and distinct geometric patterns in bright mixed colors. They will adds an elegant, fresh charm to your jewelry, crafts, or scrapbooking projects

Value Pack - 1.1lb/500g Dazzling Glitter Crystal Glass Mosaic Tiles in Various Shapes & Colors, such as triangles, squares, circles, and unique shapes for mosaic craft projects.
10. Festive Holiday Themes

Celebrate the seasons in style with festive holiday-themed mosaic pots! Choose colors that reflect various holidays—red and green for Christmas, pastels for Easter, or orange and black for Halloween. Design elements that embody the spirit of each holiday will add cheer to your garden.
For Christmas, consider adding snowflake patterns with white tiles on green pots. For Halloween, craft spooky designs with orange tiles on black pots. Hidden elements like tiny tiles can make your pots interactive and fun.
Here are some festive ideas to inspire you:
– Use bright colors to capture holiday spirit.
– Incorporate symbols associated with each celebration.
– Plan seasonal designs for a fresh look throughout the year.
These pots bring a fun and festive touch to your garden, perfect for seasonal celebrations and gatherings!
11. Upcycled Treasures from Old Dishes

Give a second life to old plates and teacups by transforming them into stunning mosaic flower pots! Break the dishes into pieces and use them creatively to design unique pots that showcase your style. This approach not only diverts materials from landfills but also adds an eclectic flair to your garden.
Choose a color scheme that complements your garden’s aesthetic. A strong adhesive will ensure the pieces stay securely attached. Opt for a vintage or mismatched style for added charm.
Follow these upcycling tips for success:
– Select designs that reflect your personal style.
– Mix patterns for a visually engaging effect.
– Use a variety of dish types for an eclectic look.
These pots are perfect for those who enjoy blending creativity with sustainability, making every piece a conversation starter!
12. Textured Mosaic with Natural Stones

Enhance your flower pots with natural stones for a textured, earthy look. Incorporate pebbles, river stones, or slate pieces alongside broken tiles to create a unique mosaic that feels connected to nature. Start by outlining your design, then fill in the spaces with an array of stones and tiles.
Mixing colors and textures will add visual interest to your design. Sealing the pot helps protect the stones from moisture while maintaining their natural appearance. Pair these pots with drought-resistant plants for a sustainable touch.
Here are some creative suggestions to consider:
– Choose stones that complement your tile colors.
– Vary the size and shape of stones for depth.
– Arrange stones to create flowing patterns.
These pots are perfect for rock gardens or xeriscapes, seamlessly adding a touch of nature to your decor.
13. Personalized Initials or Quotes

Make your flower pots truly your own by adding initials or meaningful quotes to your mosaic design. Use broken tiles to form letters or words that resonate with you, creating a personal connection to your gardening space.
Select a font style that reflects your individuality, and use a mix of tile colors to make the initials or quotes stand out. Position them prominently for maximum effect, ensuring they capture attention.
Here are tips for personalizing your pots:
– Choose meaningful phrases that inspire you.
– Opt for contrasting colors to enhance visibility.
– Experiment with placements for creativity.
This idea allows your gardening space to feel more like home, making these pots thoughtful gifts or cherished keepsakes.
Personalizing my mosaic flower pots with initials or quotes makes the garden feel like my own story. It’s easy, colorful, and incredibly rewarding—plan the letters, grab contrasting tiles, and let your space shout your name.
14. Creative Use of Shapes and Forms

Why limit yourself to traditional round pots when you can explore creative shapes? Use broken tiles to design flower pots in unique forms—think hearts, stars, or abstract designs. This artistic approach will surely capture attention and spark interest.
Consider crafting a heart-shaped pot for a romantic garden, or star-shaped pots for a whimsical touch. Abstract forms can encourage artistic expression and make for stunning focal points.
Here are some shape ideas to inspire your creativity:
– Design a whimsical pot that expresses your style.
– Use bold colors to accentuate unique shapes.
– Position them as statement pieces in your garden.
These creatively shaped pots can serve as stunning focal points in your garden, offering delightful conversation starters that reflect your artistic flair!
Conclusion

Creating mosaic flower pots from broken tiles is not just a fun craft, but a fantastic way to express your creativity while being environmentally friendly. Whether you opt for bold colors, intricate patterns, or personalized designs, each pot can reflect your unique style. Invite your friends and family to join in on the fun, and elevate your garden with these stunning upcycled decor ideas!
Frequently Asked Questions
What are mosaic flower pots and how can broken tiles be used to create them?
Mosaic flower pots are garden planters decorated with small tile pieces, turning broken tiles into art for your garden. To get started:
1) pick a pot you love and clean its surface. 2) Gather broken tiles, tile nippers, safety gloves, and exterior adhesive. 3) sketch a simple pattern or color plan. 4) apply adhesive to a small area and press tile fragments in place, leaving tiny gaps for grout. 5) once adhesive sets, mix and apply grout, wiping away excess as you go. 6) after grout cures, seal the surface with an exterior grout sealer. 7) finish by letting it dry in a shaded spot. Pro tip: choose a color palette that complements your garden and use upcycled flower pots as the base. You can create DIY garden decor that lasts.
What supplies do I need to make upcycled mosaic flower pots from broken tiles?
You really just need a few trustworthy items to get started with mosaic flower pots. Gather: pots (terracotta or concrete), broken tiles in your preferred colors, tile nippers, safety gear, exterior adhesive, grout, a damp sponge, a sealant, and a small trash bag for scraps. Optional: primer, acrylic paint for background, and felt pads for the bottom. Then ensure you have a workspace with good ventilation.
Pro tip: reuse packaging or tile samples to keep costs low while doing DIY garden decor with upcycled flower pots.
How can I prep pots and plan designs for mosaic tile projects in the garden?
Start by cleaning and drying your pot; lightly sand glossy surfaces for better adhesion. Plan your mosaic art projects design on paper or on the pot with light pencil lines. Choose a layout: grid, circular, or freeform. Cut tiles to fit curves with tile nippers. Test-fit pieces before gluing. Remember drainage: keep holes clear and avoid covering too much of the drain area. Once satisfied, begin gluing pieces in small sections, then grout and seal after drying.
What are beginner-friendly mosaic patterns for DIY garden decor using broken tiles?
Great for beginners: a simple tile border around the rim, a geometric chevron, a circular mandala, or a sunburst motif. Use bold color blocks to reduce the need for precise cuts and keep pieces larger. You can also try a faux-terracotta look by painting the pot first, then adding tile accents. Stick to a few colors to minimize waste and mistakes. Turn these ideas into creative gardening ideas in your yard.
How do I seal and care for mosaic flower pots to withstand weather?
After the grout fully cures, apply a weatherproof exterior sealer suitable for your climate. Buff off any residue and let it dry completely before planting. Clean with a soft brush or mild soapy water, and avoid harsh chemicals that can loosen grout. Inspect grout joints yearly and re-seal every 1-2 years for upcycled mosaic flower pots. Bring containers indoors during hard freezes if you have a frost-prone area.
Related Topics
mosaic flower pots
upcycled crafts
DIY garden decor
broken tile projects
creative gardening
easy DIY
outdoor decor
sustainable gardening
mosaic art
beginner friendly
recycled materials
home gardening